
A few weeks ago I told you planning season was officially underway (for me). Now I’ve found #plannerpeace <== the state in which you are finally happy with your planner setup, accessories, layout, etc. There are SO many videos on YouTube of people walking through their planner, some in excruciating detail. And while I do want to join the party and show off my setup, I decided to take a different approach. So here goes (click the links to shop):
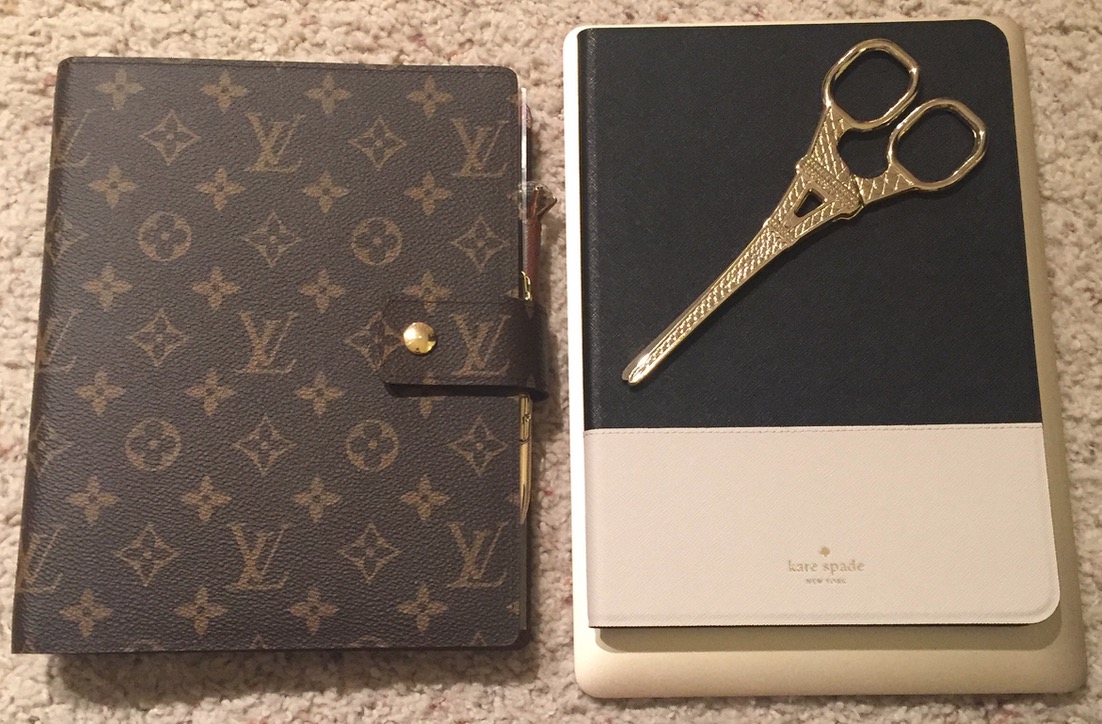
My agenda is on the left, next to my 12″ gold macbook and iPad 2 air (housed in a fabulous Kate Spade case #love), shown just so you can get a feel for the size (gold scissors). In terms of the size, it’s very generous and offers plenty of space for planning and note taking. #love2write

The picture above shows my “dashboard” – the first view I see when I open my planner. gold/marble pocket, pink & white post-it-notes, bow paper clip, bee stickers, square clips, gold pen. I found all this stuff by watching TONS of YouTube videos. The dark brown paper with the markings is just a receipt holder from the Louis Vuitton store. It’s sturdy enough to ensure those impressions, caused by the rings, don’t make their way onto the planner itself. I also have one in the back.
So what’s inside? I’m into more of a minimalist look so you won’t see tons of stickers, etc. I do use washi tape VERY sparingly, mostly in gold, black, white and blush (the theme for my planner). Inside I have 3 2 sections: planning, personal notes and work notes. #simple

The first section, shown above, is my planning section. This marble A5 paper, intended for daily use, is amazing; however, I do not use it as suggested. I use a coding system that I learned while in grad school to notate days of the week. Most are pretty straight forward except N = Sunday and R = Thursday. For me, each side of one of these planning pages = 1 week worth of planning. I note recurring appointments simply by using two letters together (i.e. MW = Monday and Wednesday) and use the extra space at the bottom for notes, etc. I do not write down all of my work stuff, only the most important meetings. Finally, my tasks / priorities for the week are listed on the right hand side. This paper is expensive, $11 for 30 sheets (or 60 days); but, by using a short hand system that works perfectly fine for my needs, I get more bang for my buck (1 pack gets me through the year); but, more importantly I avoid lugging around hundreds of pages of paper – the weight CAN add up. 😩


Sections 2 and 3 are strictly for note taking, because I like to write – a lot. I use blush lined paper for my personal, more important notes (poems, etc.) and plain white lined paper for work and general scratch paper (packing lists, etc.) Sure, you can print this paper yourself, cut and hole punch it, etc, but honestly, I’d rather not. The stickers are there for decoration only, I never actually use them.
8/28: Update – I merged sections 2 and 3 (notes section) and exclusively use the blush paper from Minted Sugar for all my notes.
So there you have it. That’s my #plannersituation! Very simple. Here are my favorite shops: sessa vee, minted sugar, cloth & paper. Oh and BTW, you probably noticed a black card peaking out in the very first picture – it’s my absolute favorite card of all time and I LOVE looking at it!

Transparent Flyleaf (used to separate note sections), Zipper Pouch for stickers
BONUS: Of all the YouTube channels I watched about planner setups – and I watch A LOT of them – the video below was most helpful for me. Hope it helps you, too! #happyplanning


